Transforming a WordPress website to Android app is a game-changer for businesses and bloggers aiming to reach a broader audience. By converting your site into an app, you not only enhance user engagement but also provide a seamless experience for mobile users. The process might seem daunting at first, but with the right tools and steps, it becomes quite manageable.
This guide will walk you through the essentials of converting your WordPress website to Android app efficiently. We'll explore the tools that simplify this process and discuss practical tips to ensure your app mirrors the functionality and design of your website. Whether you're a developer seeking to expand your app portfolio or a business owner looking to tap into the mobile market, this tutorial will help you make the transition smoothly. Get ready to leverage your WordPress content in a new and exciting format, making it accessible anytime, anywhere.
Benefits of Convert WordPress Website to Android App

Converting a c offers several significant benefits that can enhance both user experience and business outcomes.
- Improved User Engagement: An Android app provides a more personalized and immersive experience compared to a standard website. Push notifications, which are not available on mobile web browsers, can be used to keep users informed about new content, updates, or special offers. This direct line of communication helps in maintaining user engagement and driving regular interaction with your content.
- Enhanced Performance: Mobile apps generally offer faster performance and smoother navigation than websites. By leveraging native app capabilities, users experience quicker load times and more responsive interactions. This can significantly reduce bounce rates and enhance overall satisfaction.
- Offline Accessibility: Unlike websites, apps can be used offline or with limited connectivity. This means that users can access content without needing a constant internet connection, which is particularly valuable for users in areas with unstable internet access.
- Increased Brand Visibility: Having an app on the Google Play Store increases your brand’s visibility and accessibility. It makes it easier for users to find and engage with your content, contributing to greater brand recognition and loyalty.
- Better Monetization Opportunities: Android apps offer more robust monetization options compared to websites. You can incorporate in-app purchases, subscriptions, and advertising to generate revenue. Additionally, users are often more willing to spend money on apps they can easily access from their mobile devices.
- Enhanced User Experience: Mobile apps allow for a more tailored and engaging user experience. Features like offline access, background updates, and app-specific interfaces can be designed to meet the needs and preferences of your audience more effectively than a website alone.
- Competitive Advantage: In a competitive market, having a dedicated app can set you apart from competitors who only have a website. It demonstrates a commitment to providing users with a high-quality experience and can be a strong differentiator in attracting and retaining customers.
Converting your WordPress website to Android app not only enhances user interaction but also opens up new avenues for engagement and revenue.
How to Convert WordPress Website to Android App
Converting a WordPress website to Android app can significantly enhance user engagement and accessibility. This detailed guide outlines the steps required to achieve this using plugins, ensuring a seamless transition from a web-based platform to a mobile app.
Step 1: Preparing Your WordPress Website
Before starting the conversion process of your WordPress website to Android app, it's essential to ensure that your website is fully optimized for mobile use. This foundational step is crucial for delivering a seamless and satisfying user experience on mobile devices.
- Responsive Design: The first aspect to address is the responsiveness of your website. A responsive design ensures that your website adapts to different screen sizes and devices, providing an optimal viewing experience. Use responsive WordPress themes that automatically adjust the layout, images, and content to fit various screen dimensions. Test your site on multiple devices, including smartphones and tablets, to ensure it looks and functions correctly. Tools like Google’s Mobile-Friendly Test can help identify any issues with your website’s responsiveness.
- Speed Optimization: Speed is a critical factor for user retention and satisfaction. Mobile users expect fast loading times, and any delay can lead to high bounce rates. Improve your site’s loading speed by optimizing images, reducing their file sizes without compromising quality. Using browser caching, users can store frequently accessed resources locally, minimizing repeat downloads. Additionally, minimize the use of CSS and JavaScript, and ensure that these files are compressed and loaded efficiently. Plugins like WP Super Cache and Autoptimize can assist in optimizing your website’s performance.
- User Experience: A streamlined user experience is vital for keeping mobile users engaged. You can simplify your website's navigation so that it is intuitive and easy for smaller screens to navigate. Ensure that content is easily readable by using appropriate font sizes and spacing. Forms and interactive elements should be streamlined for mobile users, with large touch targets and minimal input fields to reduce user effort. Prioritize essential content and features to avoid overwhelming users with too much information or complex interactions.
By focusing on these key areas responsive design, speed optimization, and user experience you can ensure your WordPress website is well-prepared for conversion into an Android app. This preparation not only enhances the app development process but also guarantees a smooth and enjoyable experience for your mobile users.
Step 2: Choosing the Right Plugin
After focusing on key areas like responsive design, speed optimization, and user experience, the next crucial step in converting your WordPress website to Android app is choosing the right plugin. Several plugins can facilitate this conversion, each offering unique features and capabilities tailored to different needs. The following are three popular options:

- MobiLoud: MobiLoud is renowned for its seamless integration with WooCommerce and BuddyPress, making it an excellent choice for e-commerce and community-driven websites. This plugin provides a fully managed service, which means it handles much of the technical work for you, including app submission and updates. Additionally, MobiLoud offers advanced developer tools for customization, allowing you to tailor the app to match your website's design and functionality closely. This makes it ideal for businesses looking for a comprehensive, hands-off solution that still allows for significant customization.

- AppPresser: AppPresser is a highly flexible option that integrates well with various WordPress plugins. It offers extensive customization options, making it suitable for those who prefer a more hands-on approach. AppPresser allows you to build apps that mirror the look and feel of your website, and it supports features like push notifications and offline content. This plugin is particularly appealing to developers and businesses that want more control over the app development process.

- Androapp: Androapp focuses on creating fast, native apps and supports a variety of monetization options. It is designed to deliver a smooth and responsive user experience, which is crucial for retaining app users. Androapp also offers features like push notifications and offline access, enhancing the app’s usability and user engagement. This plugin is well-suited for content-heavy websites, such as blogs and news sites, looking to monetize their mobile traffic effectively.
We recommend using MobiLoud due to its comprehensive managed service and advanced customization capabilities. MobiLoud not only simplifies the conversion process but also ensures your app is optimized for performance and user engagement. Its robust integration with popular plugins like WooCommerce and BuddyPress makes it a versatile choice for a wide range of websites.
Step 3: Installing and Configuring the Plugin
Once you've chosen a plugin for converting your WordPress website to Android app, such as MobiLoud, the next critical step is to install and configure it. Here’s a detailed guide on how to accomplish this:
Plugin Installation and Activation Steps:

- Navigate to Your WordPress Dashboard: Begin by logging into your WordPress admin area. This is where you’ll manage and install new plugins.
- Go to Plugins > Add New: In the left-hand menu, click on "Plugins" and then "Add New." This will take you to the plugin installation page.
- Search for "MobiLoud": Use the search bar to find the MobiLoud plugin. Type in "MobiLoud" and press Enter.
- Click "Install Now": Once you find MobiLoud in the search results, click on the "Install Now" button. WordPress will download and install the plugin.
- Activate the Plugin: After installation, the "Install Now" button will change to "Activate." Click it to activate the plugin and make it available for configuration.
Plugin Configuration

- Follow the Setup Wizard: MobiLoud provides a setup wizard to guide you through the initial configuration. Enter your website URL, choose a name for your app, and provide a working email address.

- Preview and Subscription: MobiLoud will process your site and generate a preview of your app, free of charge. Review this preview carefully. If satisfied, you can proceed with purchasing a subscription plan. MobiLoud offers several pricing tiers starting from $199/month for up to 1,000 monthly active users, $449/month for up to 10,000 users, and $849/month for more than 10,000 users. Choose the plan that best fits your needs. If you require more customization, consult with MobiLoud’s team to tailor the app or adjust the plan.

- Configure General Settings: Once you have purchased a plan, return to your WordPress dashboard to finalize the configuration. Go to the MobiLoud settings and adjust the general settings such as app name, icon, and splash screen to match your brand.
- Set Up Push Notifications: To keep users engaged, configure push notifications. Navigate to the push menu within MobiLoud and set up the following:
- Automatic Push Notifications: Enable this feature to send notifications automatically.
- Select Push Post Types: Choose which content types (e.g., products, posts) will trigger notifications.
- Include Featured Images: Decide if push notifications should include featured images.
- Wake Your App from Background: Enable this setting to ensure notifications can wake the app when it’s not in use.
- Limit Push Notifications: Set limits to avoid overwhelming users.
- Enter Push Keys: Input your OneSignal API keys here once your app has been published. These keys are necessary for sending push notifications and will be provided after you complete the purchase and your app is built.
By following these detailed steps, you’ll effectively install and configure MobiLoud or a similar plugin to convert your WordPress website into a fully functional Android app, tailored to your needs and preferences.
Step 4: Customizing the App
Once you've successfully configured the plugin for converting your WordPress website to Android app, the next critical step is customization. This process is essential to ensure that the app not only functions correctly but also mirrors the look and feel of your website.

- Design is the first aspect of customization. Select a styling that complements your website’s existing design. Most plugins offer various themes and templates that you can use as a foundation. To maintain brand consistency, customize key design elements such as colors, fonts, and navigation components. Adjust the color scheme to match your website's palette, choose fonts that align with your brand's typography, and tailor the navigation menu to reflect your site's layout. This helps in creating a cohesive experience for users who transition from your website to the app.\

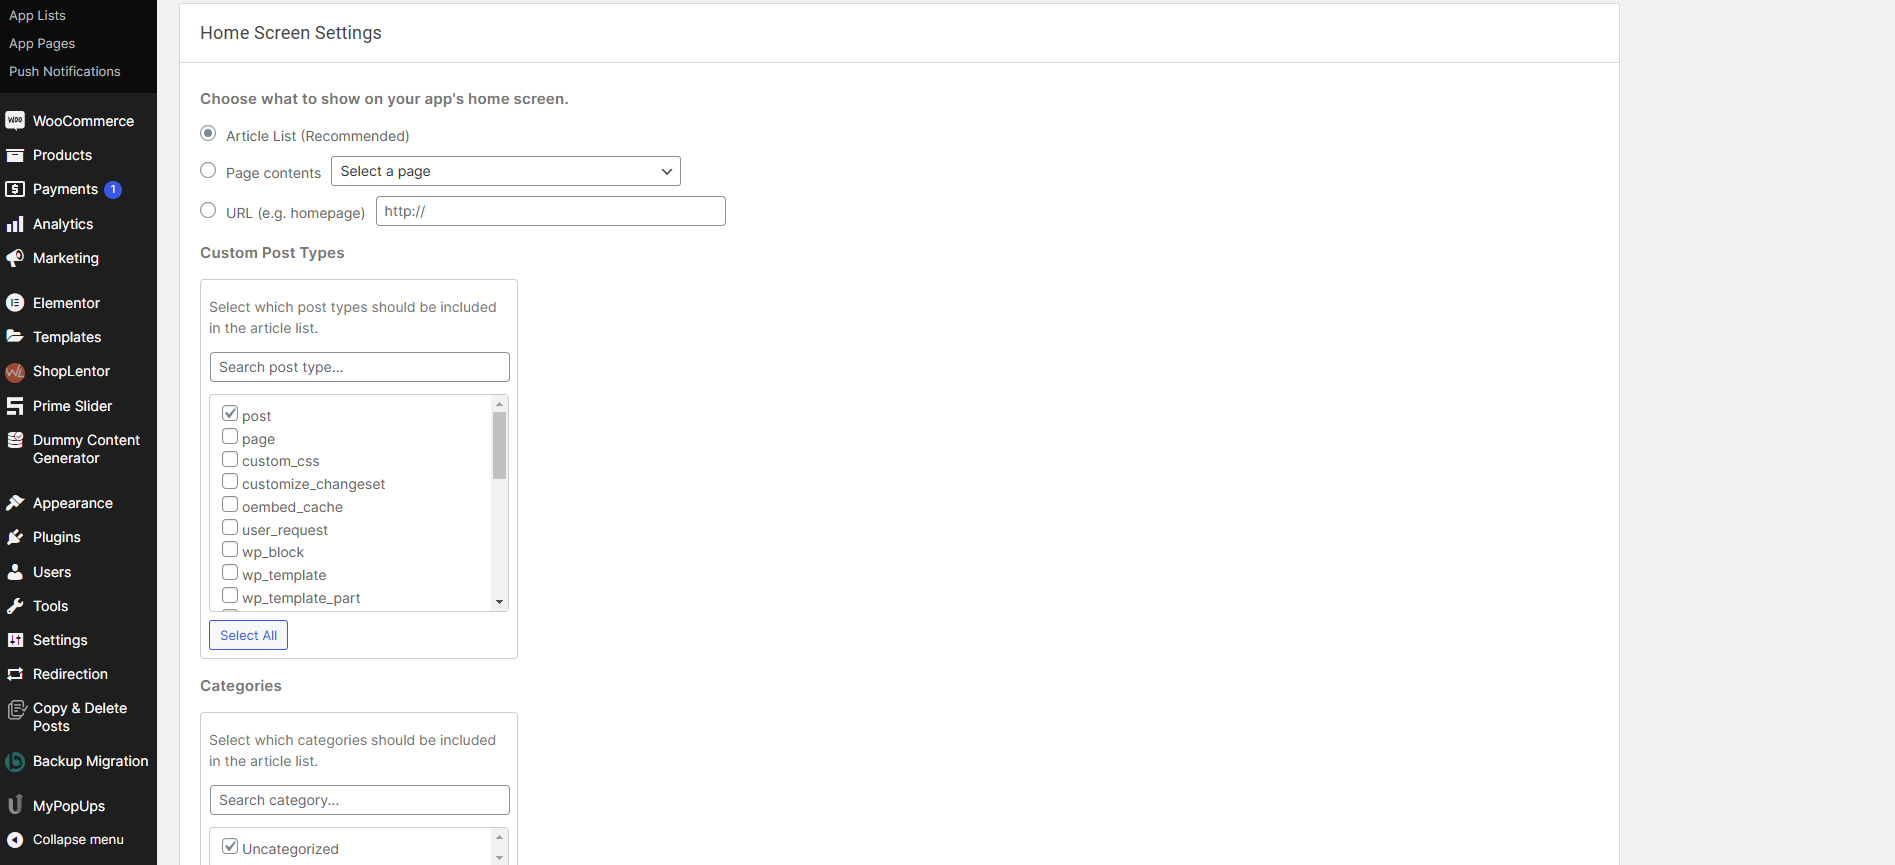
- Content and Features come next. Decide which sections of your website you want to feature in the app. Plugins typically allow you to select specific pages, posts, and categories to include. Use the plugin's code editor or settings panel to manage this selection. This ensures that the app contains relevant content that is most valuable to your users, streamlining their experience and keeping them engaged.
- Testing is crucial to validate the app’s performance. Conduct thorough testing across a range of devices to check for issues related to navigation, loading times, and overall functionality. Emulators can simulate different device environments, but testing on real devices provides a more accurate assessment. Test under various network conditions to ensure the app performs well even with limited connectivity.
This step is vital to identify and resolve any potential issues before the app is launched.
Step 5: Preparing for Launch
As you approach the final stages of converting your WordPress website to Android app, meticulous preparation is crucial to ensure a smooth launch and optimal performance.
- Final Testing is a critical phase before your app goes live. Conduct extensive testing to identify and resolve any bugs or issues that could affect user experience. This involves checking the app's functionality across various devices and Android versions to ensure compatibility. Engage beta testers select users who represent your target audience to provide feedback on usability and performance. Their insights can reveal potential improvements and help you refine the app before its public release.
- App Store Optimization (ASO) plays a vital role in your app’s visibility and attractiveness on the Google Play Store. Optimize your app’s listing by using relevant keywords in the title, description, and tags to enhance searchability. Provide a compelling description of your app, emphasizing its key features and advantages. High-quality screenshots and a promotional video are essential for showcasing your app’s functionality and design. These visual elements should capture the app’s core features and user experience, enticing potential users to download and explore.
- Compliance and Permissions are fundamental to meeting Google Play Store requirements. Ensure your app adheres to all policies and guidelines to avoid rejection or removal. Configure necessary permissions, such as access to the internet, notifications, and storage, and make sure they are clearly explained to users. Properly managing permissions not only complies with regulations but also fosters user trust and enhances app functionality.
Thorough preparation in these areas will ensure your app is polished, visible, and compliant, setting the stage for a successful launch.
Step 6: Publishing the App
Once your app is ready for release, publishing it on the Google Play Store is the final step to make it available to users. Detailed instructions on how to proceed are given below:

Create a Developer Account
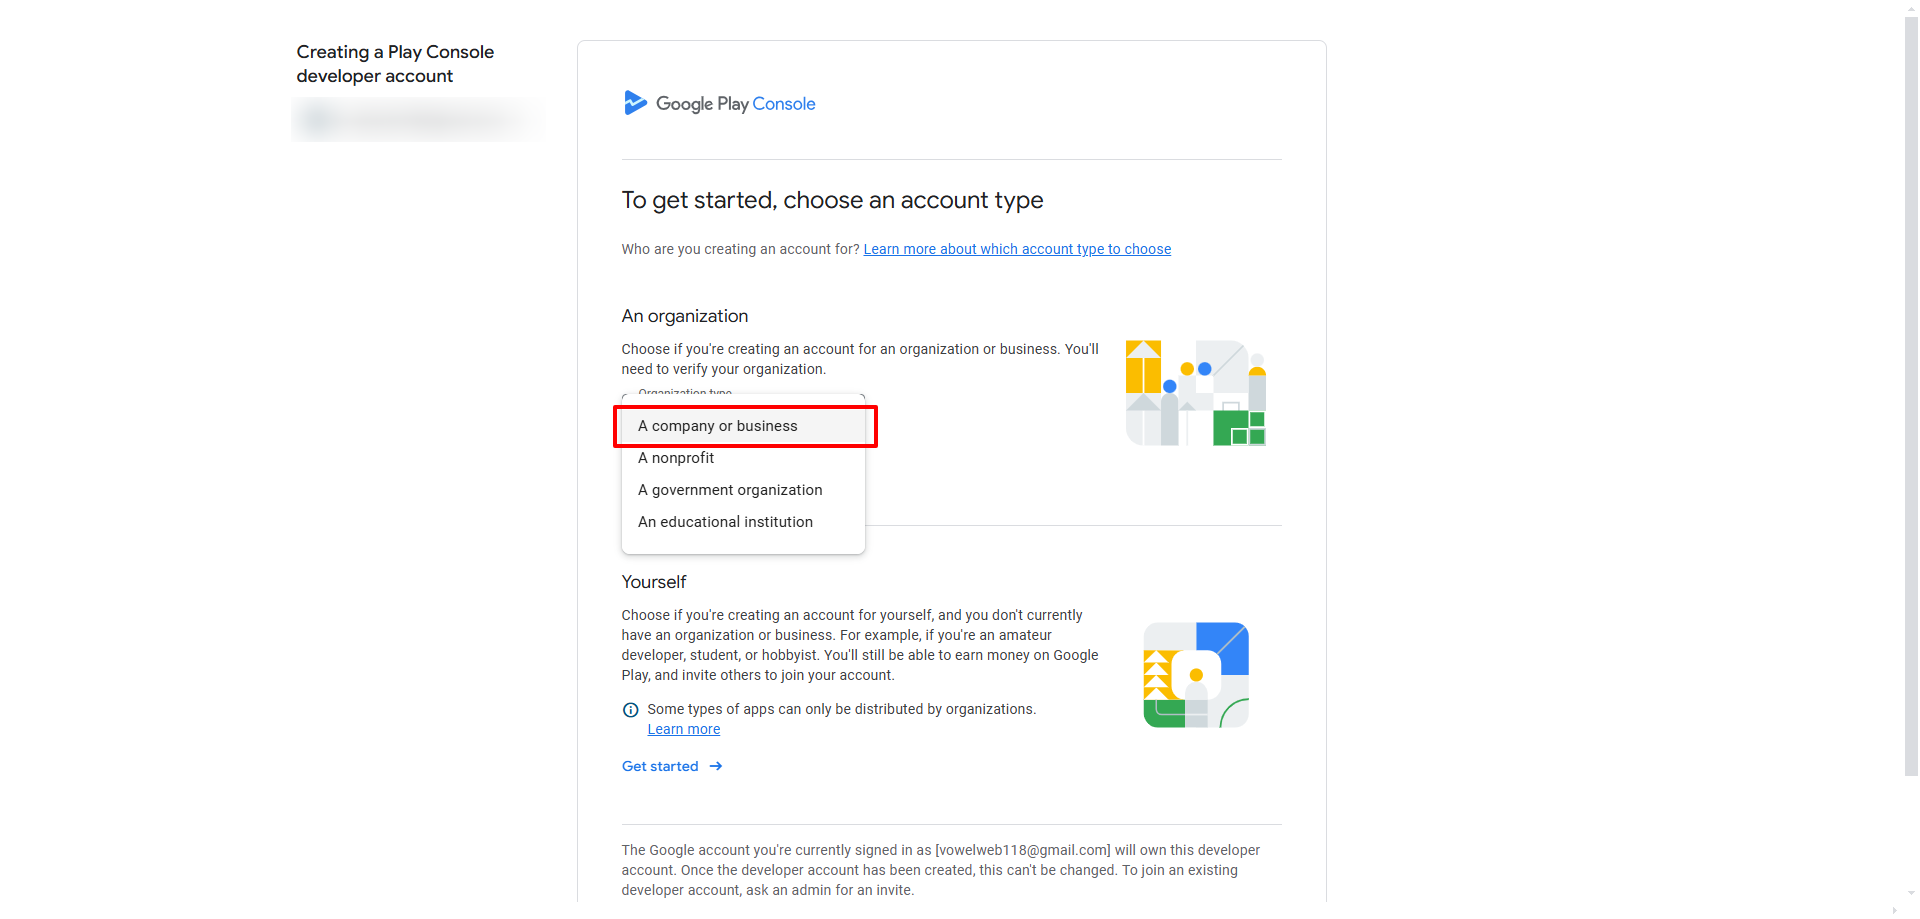
Before you can publish your app, you need a Google Play Developer account. You'll need to create an account if you don't already have one:
- Sign Up: Visit the Google Play Console and sign up for a developer account. This process requires a one-time registration fee of $25, which grants you access to the Google Play Console where you can manage your apps.
- Complete Registration: Provide the necessary details, including your business information, and agree to the terms and conditions. This account is crucial for submitting your app and handling future updates.
Prepare App Bundle
Once your developer account is set up, you need to prepare your app for submission:

- Generate the App Bundle: Use your chosen plugin to generate an APK (Android Package Kit) or AAB (Android App Bundle). These files contain all the code and resources necessary for your app.
- Sign the App: Ensure that your app bundle is signed with a valid key. App signing is crucial as it verifies the app’s authenticity and integrity. Most plugins will guide you through the signing process, but if needed, consult the plugin’s documentation.
Upload to Google Play Console

With your app bundle ready, follow these steps to upload it:
- Log In: Access your Google Play Console account.
- Create a New App: Click on "Create Application" and choose the default language for your app. Enter the app’s title and other required details.
- Upload the APK/AAB: Navigate to the "Release" section, then to "Production" and "Create New Release." Upload your APK/AAB file here.
- Complete App Information: Fill in the required details such as app name, description, category, and upload screenshots. Ensure all fields are accurately completed to meet Google’s guidelines.
Review and Publish
Finally, submit your app for review:
- Submit for Review: Once you’ve completed all necessary fields and uploaded your app bundle, submit it for review. Google will evaluate your app to ensure it complies with their guidelines and policies.
- Approval and Publication: After the review process, which can take several days, your app will be published on the Google Play Store. Once it is available, users can download and install it.
This process ensures your app is properly vetted and available for a wide audience, marking the successful transition from a WordPress website to a functional Android application.
Conclusion
Converting your WordPress website to Android app opens up a range of benefits, including improved user engagement, enhanced performance, and greater accessibility. By following the outlined steps choosing the right plugin, customizing your app, and preparing for launch you can seamlessly transition your web content into a mobile format.
WP Elemento’s premium WordPress Elementor themes are particularly suited for this purpose, offering optimized designs for various niches like eCommerce and business. These themes simplify the conversion process, ensuring that your app not only looks great but also functions smoothly. Embrace the opportunity to expand your reach and enhance user experience by leveraging these powerful tools and strategies. With careful planning and the right resources, turning your WordPress site into an Android app can be both straightforward and highly rewarding.


