
Managing multiple WordPress sites can be a daunting task, especially when each site requires individual updates, theme changes, and plugin management. If you’re looking to streamline your workflow and centralize the administration of all your sites, WordPress Multisite Network is the perfect solution. A Multisite Network allows you to run multiple WordPress sites from a single installation, making it easier to manage themes, plugins, and user roles across all your sites from one central dashboard.
In this blog, we’ll walk you through the step-by-step process of setting up a WordPress Multisite Network. Whether you’re running a network of blogs, an educational platform with multiple schools, or a business with various departments needing separate sites, a Multisite Network can save you time and effort. We’ll cover everything from enabling the Multisite feature, configuring network settings, and adding new sites to managing users and customizing themes and plugins for the entire network.
By the end of this tutorial, you’ll have a fully functional Multisite Network that simplifies your WordPress site management, enhances your workflow, and provides a scalable solution for your growing web presence. Let’s get started on transforming how you manage your WordPress sites!
What is WordPress Multisite Network?

A WordPress Multisite Network is a powerful feature built into WordPress that allows you to run multiple websites from a single WordPress installation. This networked configuration means you can create and manage a collection of sites that share a common WordPress core, but each site can have its own unique themes, plugins, and content. Essentially, it transforms a standard WordPress installation into a hub capable of hosting numerous sites, each with its own domain or subdomain. This setup is particularly useful for organizations, educational institutions, or businesses that need to manage several sites from one centralized location.
With Multisite, a single network administrator oversees the entire network, while individual site administrators manage their own sites. This hierarchical structure allows for efficient management and customization across the network. For instance, you can install a Premium WordPress themes or plugin once and make it available across all sites, saving time and reducing redundancy. Multisite also supports unique domain mapping, enabling you to assign custom domains to each site within the network, thus maintaining a professional appearance and brand consistency.
Benefits of Setting Up WordPress Multisite Network
Setting up a WordPress Multisite Network offers numerous benefits that can significantly enhance your website management and operational efficiency. Here are some key advantages:
- Centralized Management: With Multisite, you can manage multiple websites from a single dashboard. This centralized control allows for streamlined updates, theme and plugin installations, and user management. Instead of logging into each site individually, you can perform these tasks across all sites in the network from one location, saving valuable time and effort.
- Consistency Across Sites: Multisite ensures a consistent user experience across all your sites. By using shared themes and plugins, you can maintain uniformity in design and functionality. This is particularly beneficial for businesses and organizations that need to adhere to specific branding guidelines.
- Resource Efficiency: Running multiple sites on a single WordPress installation reduces server resource usage. Instead of having separate installations for each site, which can be resource-intensive, Multisite leverages shared resources, resulting in improved performance and reduced hosting costs.
- Simplified User Management: Managing user roles and permissions is simplified with Multisite. Network administrators have the ability to control access across the entire network, while site-specific administrators can manage users on their individual sites. This structure enhances security and ensures that only authorized personnel can make critical changes.
- Scalability: Multisite is highly scalable, making it an ideal solution for growing businesses or networks. As your needs expand, you can easily add new sites to the network without the need for separate WordPress installations. This scalability supports business growth and facilitates the management of an increasing number of sites.
- Enhanced Security: By maintaining a single core WordPress installation, you reduce the risk of security vulnerabilities associated with managing multiple installations. Regular updates and security patches can be applied network-wide, ensuring all sites are protected simultaneously.
- Cost-Effective: Multisite can be more cost-effective than managing multiple standalone WordPress sites. You save on hosting fees, reduce maintenance efforts, and streamline administrative tasks, resulting in overall cost savings for your organization.
Overall, it enhances operational efficiency, ensures consistency, improves resource utilization, simplifies user management, and provides a scalable, secure, and cost-effective platform for your web presence.
Steps to Setup WordPress Multisite Network
Setting up a WordPress Multisite Network involves several steps, from preparing your WordPress installation to configuring network settings and managing your sites. Here, we’ll provide a detailed guide on how to set up a Multisite Network, covering each step thoroughly to ensure a smooth and successful implementation.
Step 1: Prepare Your WordPress Installation

Before enabling the Multisite feature, it’s crucial to ensure that your current WordPress installation is ready. This preparation phase is essential for a smooth setup process and involves several key steps:
- Backup Your Site: Begin by backing up your existing WordPress site. This includes your database and all your files, such as themes, plugins, and media uploads. A reliable backup ensures that you have a safety net in case anything goes wrong during the Multisite setup. Use a trusted backup plugin like UpdraftPlus or BackupBuddy, or perform a manual backup by exporting your database and downloading your WordPress files via FTP. Having a recent backup allows you to restore your site to its previous state if needed, preventing data loss and minimizing downtime.
- Update WordPress: Ensure your WordPress installation is up to date. Running the latest version of WordPress guarantees compatibility with the Multisite feature and provides access to the latest security patches, bug fixes, and features. An outdated WordPress installation may cause issues during the Multisite setup or lead to security vulnerabilities. Update WordPress by navigating to Dashboard > Updates in your admin panel and following the prompts to install the latest version.
- Deactivate All Plugins: Temporarily deactivate all plugins to prevent conflicts during the Multisite setup process. Some plugins may not be compatible with Multisite or could interfere with the setup. To deactivate your plugins, go to Plugins > Installed Plugins in your WordPress dashboard, select all plugins, choose Deactivate from the bulk actions dropdown, and click Apply. You can reactivate your plugins once the network is configured and running smoothly.
- Check Hosting Requirements: Confirm that your Elementor hosting provider supports WordPress Multisite and that your server meets the necessary requirements. These requirements typically include a compatible PHP version (preferably PHP 7.4 or higher), sufficient memory limits (at least 256MB recommended), and proper database support (MySQL version 5.6 or higher, or MariaDB version 10.1 or higher). Additionally, ensure that your hosting plan allows for wildcard subdomains if you plan to use the subdomain option for your Multisite network. Contact your hosting provider or check their documentation for specific details on Multisite compatibility and requirements.
By thoroughly preparing your WordPress installation, you set the stage for a successful Multisite setup. This preparation minimizes potential issues and ensures a smoother transition to a Multisite Network, allowing you to manage multiple sites efficiently from a centralized administration dashboard.
Step 2: Enable WordPress Multisite
Enabling WordPress Multisite Network is a crucial step in transforming your standard WordPress installation into a network that can manage multiple sites. This process involves making specific modifications to your WordPress configuration files. Here’s a detailed guide on how to enable Multisite:

- Edit wp-config.php: Begin by accessing your WordPress root directory. This is where all the core WordPress files are located. Look for the wp-config.php file, which contains your site’s configuration settings. Open this file using a text editor. To enable the Multisite feature, add the following line of code above the line that reads /* That's all, stop editing! Happy blogging. */:
This line of code activates the Multisite functionality within WordPress, allowing you to proceed with the network setup.
- Save and Upload: After adding the code, save the changes you made to the wp-config.php file. If you’re editing the file locally, upload the modified file back to your server using an FTP client or your hosting provider’s file manager. Ensure that the file is uploaded to the correct location, replacing the old version.
- Access Network Setup: With the changes saved and uploaded, return to your WordPress dashboard. Refresh the page, and you’ll notice a new menu item under the “Tools” section called “Network Setup.” This menu item is crucial as it leads you to the network configuration process. Click on “Network Setup” to begin setting up your WordPress Multisite Network. This step involves configuring network settings, such as choosing between subdomains or subdirectories, entering network details, and updating your configuration files further.
By following these steps, you enable the Multisite feature, paving the way for the subsequent configuration and management of your WordPress Multisite Network. This allows you to centralize the administration of multiple sites efficiently from a single dashboard.
Step 3: Configure Network Settings

Now that the Multisite feature is enabled, the next crucial step is configuring the network settings. This involves setting up the type of network and defining some basic parameters to ensure your Multisite Network operates smoothly and efficiently.
-
Choose Network Type: You need to decide how your network's sites will be structured. WordPress offers two options: subdomains or subdirectories.
- Subdomains: This structure creates sites in the format site1.yourdomain.com. It's ideal if you want to maintain clear, separate identities for each site. Subdomains are often used by larger organizations or networks where each site needs its own distinct presence.
- Subdirectories: This structure creates sites as yourdomain.com/site1. It’s simpler to set up and is often preferred for smaller networks or when the sites are closely related in content and purpose.
Choose the option that best fits your needs based on the size, nature, and branding requirements of your network.
-
Network Details: Next, fill in the required fields that define your network’s identity:
- Network Title: This is the name of your network and will appear in various administrative contexts. Choose a title that accurately represents the purpose or brand of your network.
- Network Admin Email Address: Provide the primary contact email for the network administrator. This email will receive important notifications and be the main point of contact for network-related issues.
-
Update Configuration Files: WordPress will generate specific code snippets that you need to add to your configuration files to enable the network settings properly.
- wp-config.php: Add the provided code snippet to your wp-config.php file to enable the Multisite Network settings. This code snippet usually includes definitions for enabling the network and other necessary settings.
- .htaccess: Replace the contents of your .htaccess file with the provided rewrite rules. These rules are essential for proper URL handling and ensure that your network and individual sites function correctly.
- Save Changes: After updating your configuration files, save the changes and upload the modified files back to your server. Ensuring these files are correctly updated and saved is critical for the smooth operation of your network.
- Network Install: Finally, click the “Install” button to finalize the network setup. This action will implement the configuration changes and set up your Multisite Network. WordPress will log you out, and you’ll need to log back in to access the network dashboard. This re-login ensures that the new settings take effect and that you can begin managing your network from the central dashboard.
By carefully following these steps, you’ll have successfully configured your WordPress Multisite Network, setting the stage for centralized management and streamlined administration of all your sites.
Step 4: Configure Registration Settings

After successfully enabling the Multisite feature and logging back in, you’ll notice new options for network administration within your WordPress dashboard. To access the network settings, hover over “My Sites” in the top admin bar and click on “Network Admin,” followed by “Dashboard.” This action takes you to the network dashboard, where you can configure essential settings for your Multisite Network.

- In the network dashboard, navigate to “Settings” and select “Network Settings.” This area is crucial for defining how your network will function. First, confirm or update the network title and the admin email address, as these details help identify your network and ensure that important notifications are directed to the right person.

- Next, review the Registration Settings. Here, you can choose how new sites and user registrations will be handled, allowing for flexibility in managing access. Options include allowing both site and user registrations, user registration only, or completely disabling registrations.

- Under New Site Settings, you can customize the default settings for any new sites created within your network, such as the welcome email, default content, and welcome message, ensuring a consistent user experience. Additionally, adjust the Upload Settings to set limits on file uploads across the network, effectively managing storage resources.

- Finally, in the Menu Settings, determine whether site administrators have access to the plugins menu. Also If Possible try to add the WordPress menu title attribute, it will make your user experience more enhanced. Once you’ve configured these options to your satisfaction, be sure to click the “Save Changes” button to apply your settings and ensure that your network operates according to your preferences.
Step 5: Add New Sites to the Network

Once you have configured your WordPress Multisite Network settings, adding new sites to the network is straightforward and allows you to expand your web presence efficiently. Here’s a detailed guide on how to add new sites:
- Navigate to Network Dashboard: Log in to your WordPress admin area and access the network dashboard by clicking on “My Sites” in the top admin bar. From the dropdown menu, select “Network Admin” followed by “Sites.”
- Add New Site: In the “Sites” screen, click on “Add New.” This will take you to the page where you can input the details for the new site.
-
Fill in Site Details:
- Site Address: Enter the desired subdomain or subdirectory for the new site. For example, if you choose “site1” as the address and your main domain is example.com, the new site’s URL will be site1.example.com (for subdomains) or example.com/site1 (for subdirectories).
- Site Title: Provide a title for the new site. This title will appear in the network dashboard and on the site itself.
- Admin Email: Enter the email address of the site administrator who will manage this new site. This administrator will have full control over site-specific settings.
- Create the Site: After entering the required details, click on the “Add Site” button to create the new site. WordPress will automatically generate the necessary files and database entries for the new site.
- Access and Customize: Once the site is created, you can access and manage it by clicking on its title in the “Sites” list. This will redirect you to the site’s dashboard, where you can customize settings, install WordPress Elementor themes and plugins, add content, and configure site-specific options.
Adding new sites to your Multisite Network allows you to efficiently manage multiple websites from a single WordPress installation. Whether you’re creating new blogs, departmental websites, or client portals, this feature simplifies administration and promotes consistency across your network.
Step 6: Manage Themes and Plugins

One of the significant advantages of a Multisite Network is the centralized management of themes and plugins. Here’s how to handle them:
- Network Activate Themes: To make a theme available to all sites in the network, go to “Themes” in the network dashboard and click “Network Activate” next to the desired theme. This allows individual site administrators to activate the theme on their sites.
- Network Activate Plugins: Similar to themes, you can network activate plugins by going to “Plugins” in the network dashboard and clicking “Network Activate” next to the desired plugin. This makes the plugin available for all sites to use.
- Site-Specific Themes and Plugins: If you want a theme or plugin to be available only on specific sites, do not network activate it. Instead, allow individual site administrators to activate them from their site’s dashboard.
This flexibility ensures that while you maintain control over core functionalities, each site can still customize its environment to suit its unique requirements, enhancing user experience and administrative efficiency.
Step 7: Manage Users and Roles
User management in a Multisite Network is hierarchical, with network administrators having overarching control. Here’s how to manage users and roles:
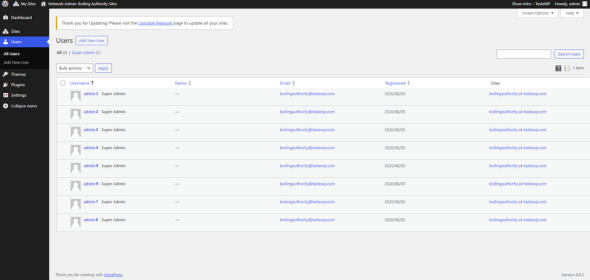
- Network Users: In the network dashboard, go to “Users” to manage all users across the network. You can add new users, assign roles, and edit user details.
- Site-Specific Users: Each site within the network can have its own set of users. Site administrators can manage users by going to “Users” in their site’s dashboard. They can add new users, assign roles, and remove users specific to their site.
- User Roles: Understand the different user roles available in a Multisite Network:
- Super Admin: Has access to the entire network and all sites within it.
- Administrator: Manages a specific site and has access to site-specific settings.
- Editor: Manages content on a specific site, including posts, pages, and comments.
- Author: Can write and manage their own posts on a specific site.
- Contributor: Can write and submit posts for review but cannot publish them.
- Subscriber: Can only manage their profile and view restricted content.
By effectively managing users and roles in a Multisite Network, administrators can maintain security, ensure efficient workflow management, and tailor permissions to meet the diverse needs of their network’s users and sites.
Step 8: Customize Network Settings
Customizing network settings allows you to fine-tune how your Multisite Network operates. Here are some important settings to consider:
- Domain Mapping: If you want to use custom domains for your sites (e.g., site1.com instead of site1.yourdomain.com), you’ll need to set up domain mapping. Use a domain mapping plugin or configure your DNS settings to point to the correct server.
- Network Plugins: Some plugins are specifically designed for Multisite Networks. These plugins can help you manage network-wide settings, enhance security, and provide additional functionality. Explore and install plugins that suit your network’s needs.
- Network-Wide Settings: In the network dashboard, you can access additional WordPress settings under “Settings” > “Network Settings.” Here, you can configure various options such as:
- New Site Settings: Customize the default settings for new sites, including the welcome email, default content, and welcome message.
- Upload Settings: Set limits for file uploads across the network to manage storage effectively.
- Menu Settings: Determine whether administrators of individual sites can access the plugins menu.
- Customize Login Experience: Enhance the login experience for your network’s users by customizing the login page. Use plugins or custom code to brand the login page with your organization’s logo and design.
Step 9: Monitor and Maintain Your Network
Regular monitoring and maintenance are essential to keep your Multisite Network running smoothly. Here are some tips:
- Monitor Performance: Use performance monitoring tools to keep an eye on your network’s performance. Monitor page load times, server resource usage, and database performance to ensure optimal speed and reliability.
- Regular Backups: Implement a robust backup strategy for your Multisite Network. Regularly back up your entire network, including all sites, databases, and files. Use a reliable backup plugin or a managed hosting service that offers automated backups.
- Update WordPress Core, Themes, and Plugins: Keep your WordPress installation, themes, and plugins up to date. Regular updates provide security patches, bug fixes, and new features. Schedule regular update checks and apply updates promptly.
- Security Best Practices: Implement security best practices to protect your Multisite Network from potential threats. Use strong passwords, enable two-factor authentication, install security plugins, and regularly scan your network for vulnerabilities.
- Regular Audits: Conduct regular audits of your network to identify and address any issues. Check for outdated themes and plugins, inactive users, and any anomalies in your network settings.
- User Training: Educate your network’s site administrators and users on best practices for managing their sites. Provide training on using the WordPress dashboard, updating content, and maintaining security.
Step 10: Troubleshooting and Support

Despite careful planning and implementation, you may encounter issues with your Multisite Network. Here’s how to handle common problems and seek support:
- Common Issues: Familiarize yourself with common Multisite issues, such as domain mapping problems, plugin conflicts, and network performance issues. Use WordPress forums, documentation, and support resources to troubleshoot and resolve these issues.
- Error Logs: Enable error logging in your wp-config.php file to capture and diagnose errors. Review the error logs to identify and fix issues.
- Support Resources: Take advantage of the vast WordPress support community. Use forums, documentation, and online tutorials to find solutions to your problems. Consider joining WordPress groups or communities to connect with other Multisite Network administrators.
- Professional Support: If you encounter complex issues that you can’t resolve on your own, consider seeking professional support. Hire a WordPress developer or consultant with experience in Multisite Networks to help you troubleshoot and optimize your network.
Conclusion
Setting up a WordPress Multisite Network is a game-changer for managing multiple websites efficiently. By understanding what a Multisite Network is and recognizing its numerous benefits, you can significantly streamline administration and enhance user experience across your sites. The steps outlined from preparing your installation and enabling the Multisite feature to customizing network settings and managing users provide a comprehensive roadmap to create a centralized hub for your web presence.
With a well-configured WordPress Multisite Network, you can enjoy consistent branding, simplified updates, and enhanced security while saving time and resources. Whether you’re running a network of blogs, educational platforms, or corporate sites, implementing this powerful feature will transform how you manage your WordPress environment. Embrace the potential of Multisite to optimize your workflow and provide a seamless experience for site administrators and users alike.

