
Expanding your retail store’s reach beyond its physical location is no longer optional it's essential for growth and survival. Selling products online has become a powerful strategy to attract new customers, increase revenue, and build brand recognition. But diving into the world of eCommerce can feel overwhelming without a clear roadmap.
Understanding how to sell a product online effectively involves more than just setting up a website. It requires selecting the right platform, showcasing your products in a way that resonates with your target audience, and leveraging marketing strategies to drive traffic and conversions. From creating compelling product listings to utilizing search engine optimization (SEO) and social media, the right approach can transform your online presence into a thriving sales channel.
Whether you’re a small business owner or managing a retail chain, this blog will walk you through actionable steps to take your products online. So, get ready to elevate your retail store by learning how to sell a product online and unlock new opportunities for growth!
Steps on How to Sell a Product Online
Creating an eCommerce store on WordPress using WooCommerce provides an ideal solution for small and large businesses alike. WooCommerce, a flexible and powerful WordPress plugin, seamlessly converts your website into a professional online store. Let’s have a look at the steps on how to sell a product online effectively.
Step 1: Choose a Domain Name and Web Hosting

The first crucial step when learning how to sell a product online is to choose a domain name and secure reliable web hosting. Both elements serve as the foundation for your eCommerce site and play a significant role in branding, visibility, and overall performance.
Domain Name
Your domain name is essentially the online address of your store, and it should reflect your brand’s identity while being easy to remember. Choose a name that is simple, catchy, and clearly relates to the products you are selling. For example, if you specialize in selling handmade crafts, a domain like CraftHeaven.com not only communicates your niche but also makes it easy for potential customers to recall. Ideally, keep it short, avoid special characters or hyphens, and ensure the name resonates with your target audience. A memorable domain name is essential for building brand recognition and trust, which are key factors in driving sales.
Web Hosting
Once you've chosen your domain name, the next step is selecting reliable web hosting. Your web hosting provider is where your website files are stored, and the quality of hosting directly affects your site’s performance, speed, and security. Opt for hosting providers like Bluehost, SiteGround, or HostGator, which are known for their WordPress and WooCommerce compatibility. These providers offer optimized plans that ensure fast loading speeds, ample storage, and strong security features like SSL certificates. SSL certification is essential for protecting sensitive customer data, especially during transactions. Many hosting companies also simplify the setup with one-click WordPress installation, making the process of launching your online store quick and straightforward.
Choosing the right domain and Elementor hosting provider sets the stage for a successful online business by ensuring a seamless, secure, and user-friendly shopping experience for your customers.
Step 2: Install WordPress
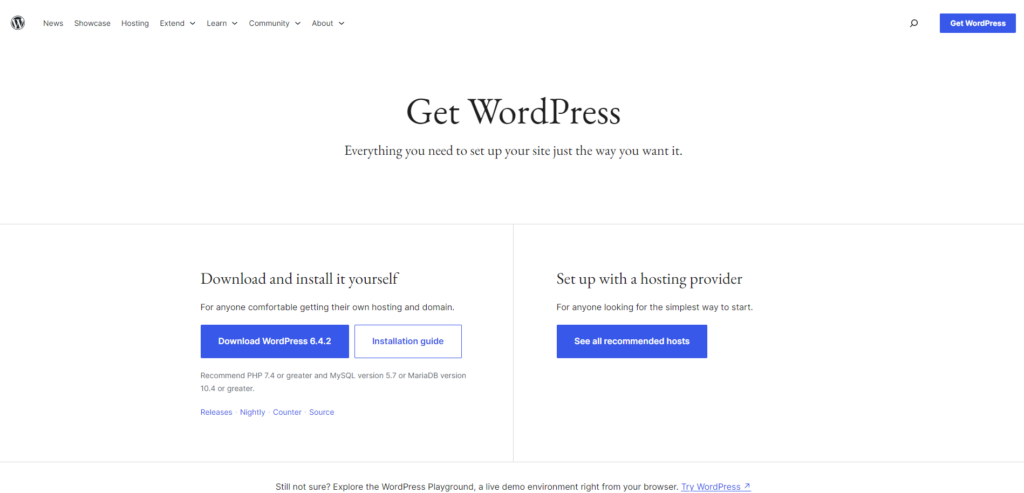
Once you have secured your domain name and selected a reliable hosting provider, the next step on how to sell a product online is installing WordPress. This process is simple and essential for setting up your eCommerce store.
Login to Hosting Account
The first task is logging into your hosting account. Access the control panel (also known as cPanel) provided by your hosting service, where you will find all the tools and features necessary to manage your website. Look for the WordPress installation section, typically labeled as "One-Click Installs" or "Website Builders."
Use the One-Click Installer
Most hosting services offer a one-click WordPress installer, which simplifies the setup process. This installer will automatically download and set up WordPress on your domain, saving you time and effort. If you prefer manual installation, you can download WordPress from its official site and upload the files to your server using FTP software like FileZilla.
Complete the Configuration
Once WordPress is installed, you’ll need to configure it. The installer will prompt you to enter your site’s name, admin credentials, and email address. Choose a strong password for security and set the site’s title to reflect your brand. After this, you’ll be ready to access your WordPress dashboard, the central hub where you’ll manage your store’s products, themes, plugins, and settings.
Your WordPress dashboard will be the foundation for running and managing your online store efficiently. If You want a detailed guide then you can also visit our blog on how to install WordPress in easy steps.
Step 3: Select a Premium WooCommerce Theme

Selecting a premium WooCommerce theme is crucial for creating a successful online store that attracts and retains customers. A premium theme not only enhances the aesthetics of your site but also ensures excellent usability, providing a seamless shopping experience. WP Elemento offers a wide range of WooCommerce-optimized themes, including the Shoes Store WordPress Theme, Fashion Shop WordPress Theme, and Printing Press WordPress Theme. These themes are specifically designed to work with WooCommerce and are fully compatible with Elementor, a popular page builder that simplifies website design with drag-and-drop functionality.
One of the standout features of WP Elemento’s themes is the one-click demo import functionality, that uses the WP Elemento Importer plugin which allows you to replicate the demo layout quickly. This feature saves time by importing all the necessary pages, images, and product layouts so you can focus on customizing the content to fit your brand.
When choosing a theme, consider the following factors:
- Responsiveness: It’s essential to select a mobile-friendly theme, as a significant portion of online shoppers use smartphones and tablets. A responsive theme ensures your store looks great on any device.
- Speed Optimization: A fast-loading website improves user experience and enhances your SEO rankings. Opt for a theme that is optimized for speed to minimize bounce rates and maximize conversions.
- Customizability: Look for themes that integrate with Elementor for effortless customization. Elementor’s drag-and-drop editor allows you to design your store without any coding knowledge, giving you full creative control.
Step 4: Install, Activate, and Import Demo Content
Once you’ve purchased a premium WP Elemento theme, the next step in how to sell a product online is to install, activate, and import demo content. This process is crucial because it allows you to set up your eCommerce store with ready-to-use content that serves as a foundation for your website.

- Upload Theme: First, navigate to your WordPress dashboard and go to Appearance & go to Themes. Click on the Add New button, then upload the ZIP file of the theme that you received after purchasing. Once the ZIP file is successfully uploaded, click Install and wait for WordPress to extract the theme files and install them on your site.

- Activate Theme: After the theme is installed, activate it by clicking on the Activate button. This will apply the theme's design and layout to your WordPress site, giving it the look and feel of the demo store.
- Enter License Key: Next, enter the license key provided in the purchase email. This is essential for theme validation and to unlock updates and support. You’ll typically find an option to enter the license key on a prompt after activating the theme.

- One-Click Demo Importer: Once the theme is activated, click on the Demo Import button, which triggers the import of all necessary plugins like WooCommerce and any additional plugins that the theme requires. During the import process, demo content such as pages, images, and products will be added to your site. This demo content acts as a placeholder framework, making it easier to customize with your own branding, products, and information. With everything in place, you can begin tailoring the website to reflect your unique store and offerings.
Step 5: Customize Site Content and Images

Customizing your site content and images is a vital step in making your online store unique and aligned with your brand identity. By replacing demo content with your own, you create a professional and engaging site that speaks directly to your target audience.
Start with the Home Page, where you should update banners, taglines, and featured products. Your homepage is often the first impression customers will have of your brand, so it’s important to showcase your best-selling or new products, along with compelling call-to-action phrases like "Shop Now" or "Explore Our Collection." Clear, concise messaging about your store’s unique value proposition will entice visitors to explore more.
Next, update the About Page to reflect your brand’s story, mission, and values. This is where you can connect with your audience on a personal level, sharing why your business exists, what makes it special, and how your products fulfill customers' needs.
For transparency and trust, make sure to edit your Policy Pages. Include important details about shipping, returns, and privacy policies. This helps establish credibility and ensures that customers feel secure in making a purchase.
Lastly, replace the demo images with high-quality visuals that showcase your products. Crisp, professional images are key to convincing customers of your product’s quality. Elemento's intuitive drag-and-drop interface makes these tasks seamless, enabling you to easily customize every section of your website without technical skills. If you lack technical skills and if you are a beginner with these things then you can take help from our tutorial on how to customize WordPress themes.
Step 6: Update Demo Products and Add Your Products
Update Demo Products and Add Your Products
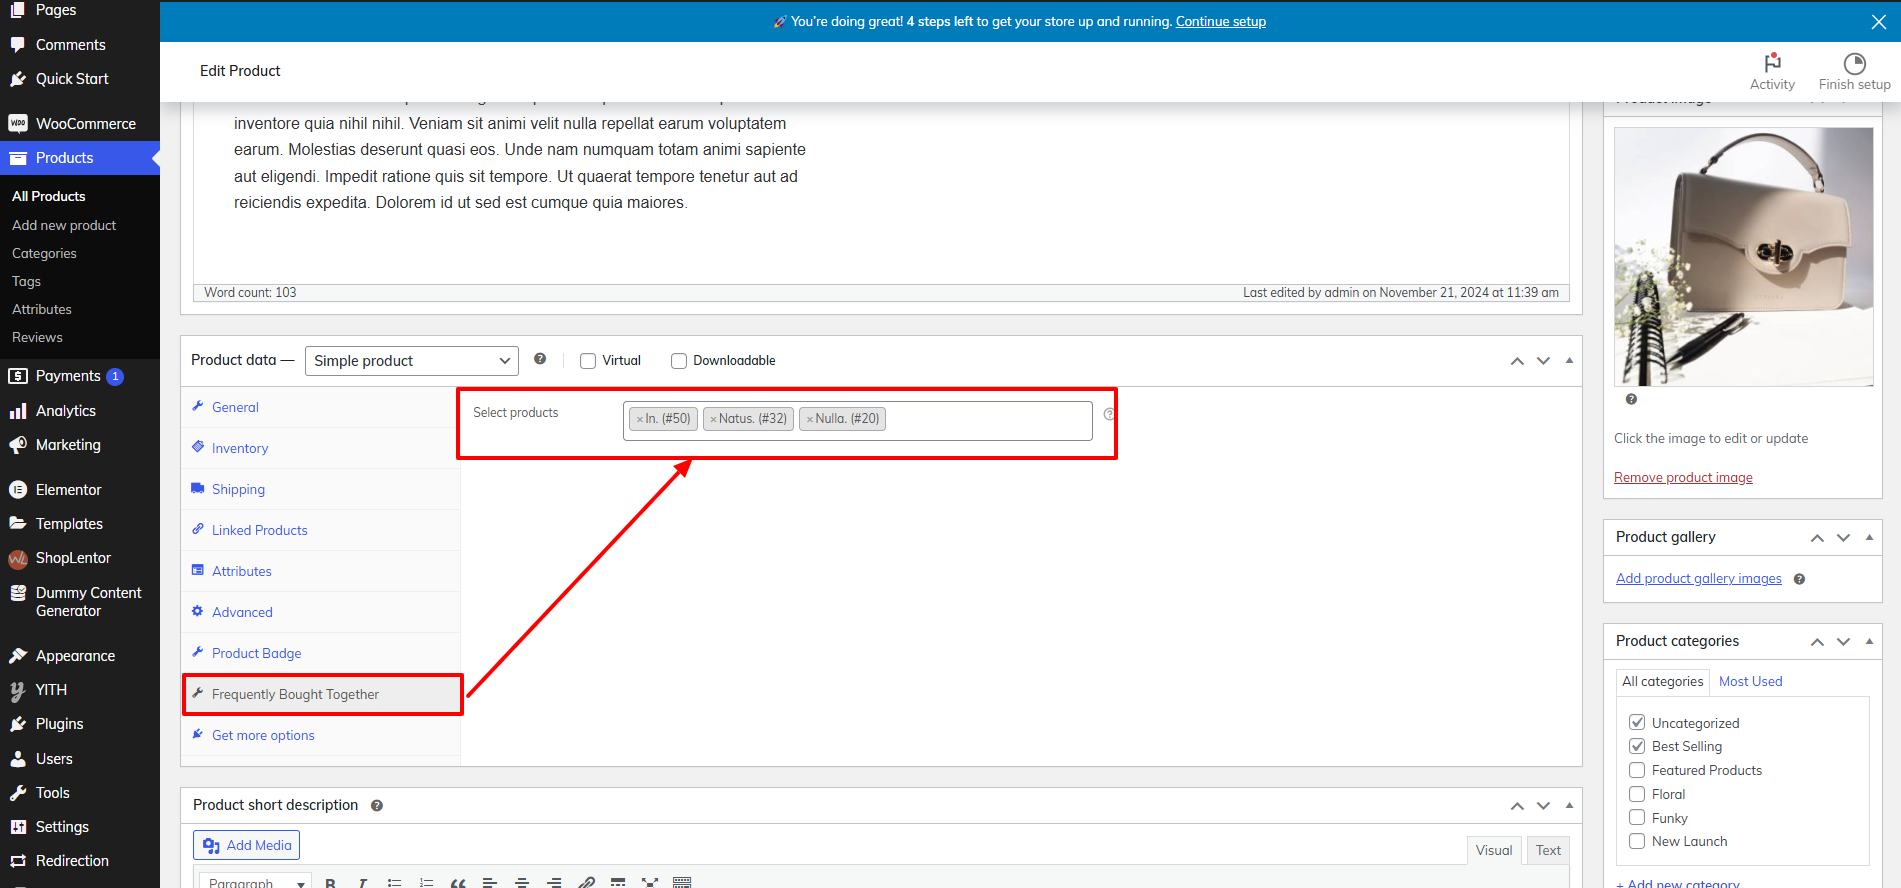
Products are the heart of your eCommerce store, and adding them correctly is essential for driving sales and creating a seamless shopping experience. After importing demo content, it’s crucial to replace those products with your own offerings.
- Navigate to Products: To get started, go to your WordPress dashboard, then click on Products > All Products. This section allows you to manage all of your products, whether you're editing demo items or adding new products. Simply click on an existing demo product to edit or click "Add New" to create a fresh product listing.
- Fill Product Details:
- Name: Provide clear, descriptive titles that instantly convey what the product is. For instance, instead of just “Shirt,” use “Men’s Blue Button-Down Shirt” for specificity.
- Description: Craft compelling and detailed descriptions that emphasize the features, benefits, and unique selling points of the product. Highlight why it’s a must-have and how it solves a customer’s problem.
- Images: Upload high-resolution images that showcase the product from various angles. Make sure the images are clear and professional to give customers a true representation of the product.
- Price: Set an accurate price for the product. If you’re offering a discount, be sure to specify both the original and discounted prices to create urgency.
- Categories: Organize your products into relevant categories for easier navigation. For example, create categories like “Men’s Apparel” or “Accessories.”
For products with multiple options (like size or color), configure these variations using WooCommerce’s variable product feature. This allows customers to select different versions of the product, enhancing their shopping experience.
Step 7: Configure Payment Gateways

When selling products online, secure payment processing is crucial for building customer trust and ensuring smooth transactions. WooCommerce provides robust support for multiple payment gateways, allowing you to choose the most suitable options for your store. Popular Woocommerce payment methods include PayPal, Stripe, Direct Bank Transfer, and Cash on Delivery. Each option caters to different customer preferences and regional needs, providing flexibility and convenience.
To set up payment gateways in WooCommerce:
- Go to WooCommerce Settings: Navigate to WooCommerce > Settings > Payments. Here, you’ll see a list of available payment gateways.
- Enable and Configure Gateways: Select the payment methods you want to enable and click Set Up. For PayPal and Stripe, you’ll need to enter your merchant account credentials. For Direct Bank Transfer, you can add bank details for customers to process payments directly to your account. Cash on Delivery can be activated for customers who prefer to pay in cash when their products are delivered.
- SSL Certification: Ensure your site has SSL certification, which encrypts sensitive customer data during transactions. This step is vital to provide secure payment processing and comply with industry standards. An SSL certificate reassures customers that their financial information is protected, which can increase conversion rates and customer loyalty.
By configuring the right payment gateways and ensuring secure transactions, you enhance your online store's reliability and streamline the buying process, ultimately driving sales.
Step 8: Set Up Shipping Options

Setting up shipping options is a critical step when learning how to sell a product online. This process ensures that customers know how much they’ll pay for shipping and can select from a variety of delivery methods that best fit their needs. Here are some of the Woocommerce shipping settings that are important while configuring the shipping settings:
- Shipping Zones: Start by defining your shipping zones, which are geographical areas you plan to deliver to. These could range from local zones, such as within your city or country, to global zones for international shipping. In WooCommerce, you can configure shipping zones based on postal codes or countries. This ensures that customers are charged appropriate shipping fees based on their location, helping you manage costs effectively.
- Shipping Methods: Next, decide on the shipping methods you’ll offer to customers. Popular options include flat-rate shipping, where a fixed cost is applied regardless of order size, free shipping, which can be applied based on conditions like a minimum order amount, or local pickup, allowing customers to pick up their orders directly from your physical store. Offering these options increases flexibility and customer satisfaction.
- Shipping Classes: You can assign shipping classes to products based on their size, weight, or other attributes. For example, heavier or bulky items could have a different shipping rate compared to lighter products. This helps you more accurately reflect shipping costs.
Finally, displaying shipping costs during checkout ensures transparency and reduces cart abandonment, as customers will know the full cost before completing their purchase.
Step 9: Optimize for SEO

Search Engine Optimization (SEO) is a critical element in driving traffic to your eCommerce store and increasing sales. It enhances your store’s visibility on search engines like Google, making it easier for potential customers to discover your products. Here are key steps for SEO optimization when selling products online.
- Keywords: The foundation of SEO is keyword usage. By strategically incorporating relevant keywords, such as "how to sell a product online" and other related phrases, into your product titles, descriptions, and meta tags, you help search engines understand the content of your pages. For example, if you're selling eco-friendly skincare products, including terms like "organic skincare" or "natural beauty products" can help you target specific customer searches.
- SEO Plugins: To streamline the SEO process, installing plugins like Yoast SEO or Rank Math is highly beneficial. These tools offer on-page optimization features, guiding you in optimizing your content for search engines. They also help you with keyword placement, content readability, meta descriptions, and title tags, ensuring your store is SEO-friendly.
- Blog Content: Regularly adding fresh and engaging blog content relevant to your products is another great way to attract organic traffic. Blogs can cover topics related to your niche, product usage tips, or industry trends. Each blog post provides additional opportunities to include relevant keywords, improving your site's overall SEO performance.
A well-optimized eCommerce store can rank higher on search engine results, increasing organic traffic, and ultimately driving more sales.
Step 10: Test Your Store and Launch
Before launching your eCommerce store, it’s essential to perform thorough testing to ensure that everything works seamlessly. A well-tested site is key to offering your customers a smooth and reliable shopping experience, ensuring that no critical issues arise post-launch.

- Test All Features: Begin by testing every page of your store. Start with the product pages check the product descriptions, images, and prices to ensure they display correctly. Verify that the add-to-cart functionality works and that customers can easily browse your store. Navigation is critical, so ensure all menu links and categories are functional, and the user experience is intuitive. Finally, test your website's responsiveness across multiple devices (desktop, tablet, and mobile) to confirm that it looks and functions well on all screen sizes.

- Payment Gateway Testing: Payment gateway functionality is paramount. Use sandbox accounts or test mode options provided by gateways like PayPal or Stripe to simulate transactions. This allows you to confirm that payments are processed correctly and that the checkout experience is smooth and secure.

- Plugin and Theme Compatibility: Ensure all installed plugins and your theme are compatible with each other and updated. Conflicts between plugins or outdated themes can lead to broken features or poor site performance. Test each plugin to verify that all functions, such as shipping, taxes, and reviews, are operational.
After fixing any identified bugs, your store will be ready for launch, delivering a flawless customer experience.
Step 11: Promote Your Store to Boost Sales
After successfully launching your eCommerce store, the next crucial step is to promote it to attract customers and boost sales. A solid marketing strategy will help increase visibility and drive traffic to your site. Let’s explore three effective ways to promote your store:
- Social Media Marketing: Social media platforms like Instagram, Facebook, and Pinterest are powerful tools for reaching a broad audience. These platforms allow you to showcase your products visually, making them perfect for retail promotions. Share high-quality images, videos, and product updates regularly to engage with your followers. Create attention-grabbing posts about new arrivals, seasonal promotions, or limited-time offers. Utilize Instagram Stories, Facebook Ads, and Pinterest Pins to target specific demographics and increase brand awareness. Additionally, encourage customer-generated content, such as reviews or photos of customers using your products, to build trust and create a community around your brand.
- Email Campaigns: Email marketing is one of the most cost-effective ways to keep customers engaged. Send regular newsletters to your subscribers with updates on new product launches, sales, and promotions. Personalized emails, such as welcome messages or abandoned cart reminders, can help encourage conversions. Segment your email list based on customer behavior, preferences, and purchase history to send targeted offers, enhancing the chances of a sale.
- Google Ads: Running paid search campaigns through Google Ads is a great way to drive targeted traffic to your site. By bidding on specific keywords such as “how to sell a product online,” you can ensure your store appears in front of potential customers actively searching for products similar to yours. Set clear goals and budget parameters for your campaigns, and monitor their performance to maximize your return on investment (ROI).
Conclusion
In conclusion, selling a product online can significantly boost the sales of your retail store, reaching a broader audience and providing new growth opportunities. From choosing the right domain name and web hosting to setting up your products, configuring payment and shipping options, and promoting your store, the 11 steps outlined will guide you in how to sell a product online with a successful eCommerce store. Remember, optimizing your store for SEO and streamlining the checkout process are crucial for maximizing conversions and customer satisfaction.
To ensure your online store looks professional and performs efficiently, don’t forget to check out the premium WordPress Elementor themes by WP Elemento. These themes are designed for easy customization, fast loading, and seamless WooCommerce integration, helping you create an attractive and functional online store. Take the leap today and transform your retail business into a thriving online store that drives sales and elevates your brand!

